

Fred's Appliance
June 10, 2019
Oven Repair
What’s the Difference Between a 3-Prong Range Cord and 4-Prong Range Cord?
If you live in a home that was built prior to 1996, the outlet for your kitchen range may still require a 3-prong cord. It is, in fact, considered code-compliant to continue using the 3-prong configuration in pre-1996 homes. Why is this date important? The National Electric Code (NEC) updated their requirements for 240-volt appliances and changed them from 3-wire cords and receptacles to 4-wire cords and receptacles.
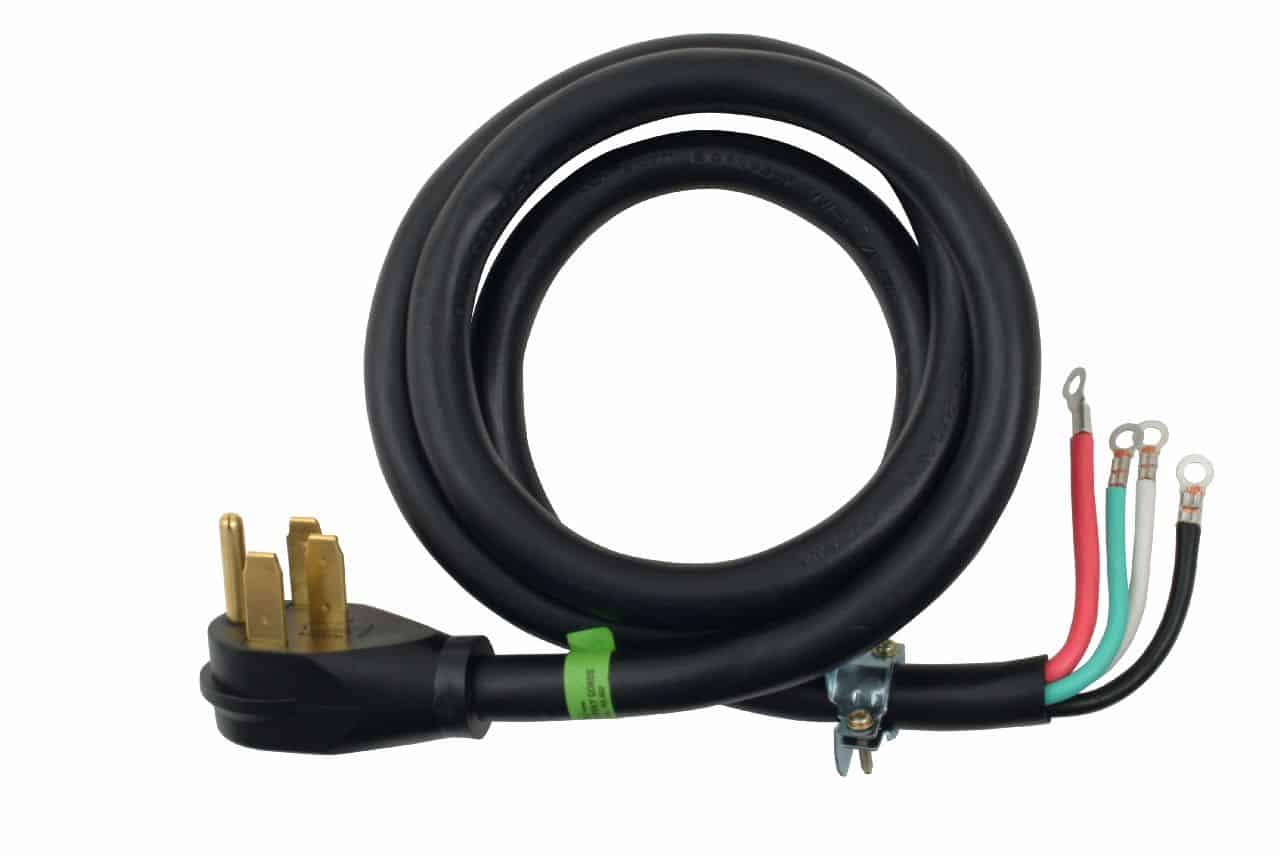
The code applies only to homes built after 1996; however, you may have run into an instance where you were faced with trying to hook a 4-prong range cord up to the home’s 3-prong receptacle or vice versa. The difference is that in older appliance installations, the legally-installed 3-wire cord consisted of wiring that was configured with two hot wires and one neutral wire. The new 4-prong construction provides the 4th grounding conductor that was missing in the 3-wire configuration.
The purpose of the neutral wire on the 3-wire cord and plug setup
- It is the return path for the 120-volt loads that handle the range’s timer, clock, lighting, etc., and it carries that current back to the 240-volt source.
- It was connected to both the metal frame and housing of the range so that it would trip the circuit breaker if there was a short to the ground.
The problem with this configuration was that the appliance may not always trip the circuit breaker. An example is if the 3-prong’s neutral wire wasn’t connected to the metal frame and housing of the appliance. If there is no return path for the current to flow back to the source, then the metal housing is energized, and it can deliver a shock to a person who touches it.
The purpose of the 4-wire cord and plug configuration
- The equipment grounding conductor (the 4th wire) now serves as the conductor that is attached to the metal frame and housing of the range.
- The 4th wire’s purpose is to return any fault current that’s on the metal in the case of a short to ground situation.
- The NEC prohibited the neutral wire in the cord from being connected to the metal frame and housing for any new construction in 1996 and later.
By the laws of physics, the moving current of the neutral wire will naturally follow the path of least resistance. Electrical current on the exposed metal could easily make contact with a human being in order to continue its path, which is why the NEC changed the requirements for ground connections on 240-volt appliances.
Steps to replacing a range cord
New ranges are sold without the cord so that you can install the cord that fits the outlet in your wall. If you live in an older home that has a 3-prong outlet, the NEC code allows you to change the cord to match the existing outlet. Conversely, if you move an older appliance that’s outfitted with a 3-prong cord into a newer home, you can also change that cord to one with a 4-prong configuration to match the new outlet.
The process of changing the range cord to meet regulations
Prior to beginning:
- Make sure the range is off and unplugged.
- Use a magnetic screwdriver to catch any screws that might fall into the appliance.
Removing the access panel:
- Open the access panel on the back of the range at the point where the cord enters.
- Label which color wire attaches to the appropriate terminal using pieces of masking tape.
Removing the old cord:
- Loosen the screws that hold the wires in place.
- Disconnect the ground wire.
- Holding the strain relief bracket in place with a pair of pliers, loosen the bracket screws.
- Remove the cord.
Attaching the new cord:
- Attach the cord as follows:
- 3-prong cord:
- Attach the ground wire to the center terminal (it’s the middle wire).
- Attach one of the outer wires to the right terminal.
- Attach the remaining outer wire to the left terminal.
- Attach the ground wire that’s on the center terminal to the range case.
- 4-prong cord:
- Attach the white wire to the center terminal.
- Attach the red wire to the right terminal where the red wire is installed.
- Attach the black wire to the left terminal where the black wire is installed.
- Attach the green wire to the green grounding screw on the range case.
- Remove any masking tape.
- 3-prong cord:
Reattaching the access panel:
- Attach the strain relief bracket to the cord access hole by evenly tightening the bracket screws onto the cord.
- Return the access panel onto the back of the range.
Testing the range:
- Make sure the power to the range outlet is off.
- Plug the range into the outlet.
- Turn the power back on and turn on the range to test it out.
Fred’s Appliance Service
If you’re not comfortable with replacing the cord yourself, the technicians at Fred’s Appliance Service are available to install a new 3-prong or 4-prong cord onto your range. We offer a very quick turnaround on parts delivery for over 90% of our service calls, which means we are able to provide fast service for your repair needs. Our family-owned business prides itself on providing top-quality service to our neighbors in Lake, Geauga, Ashtabula, Portage, Lorain, and Cuyahoga Counties of Ohio. It’s what we’ve done since starting the business in 1996.Fred’s services all major household appliances. We are available to assist you with your range’s cord replacement or for any other appliance service. Our goal is to help keep your life running smoother with our knowledge of the appliance industry and our dedication to customer service. The reviews of some of our clients serve as a testament to our work.
Contact Fred’s Appliance Service with any questions. If you require repair, we’ll send a factory-trained technician to your home to assist you. Our professionals are skilled in working on every make and model of appliance and from all of the leading manufacturers.
888-453-7337Text or ring! ring!
Live ChatClick to say hi

Apr. 09, 2024
How to Fix the nF Error Code on a Samsung Washer

Apr. 09, 2024
Kenmore Elite Dryer Issues: How To Troubleshoot

Mar. 06, 2024
Microwave vs. Oven: Pros and Cons and How They Differ

Mar. 06, 2024
Self-Cleaning Oven Smell: Causes & Odor Reduction Tips

Mar. 06, 2024
Frigidaire Ice Maker Not Working? 7 Ways to Fix It

Feb. 05, 2024
Why Is Your LG Refrigerator Not Cooling? (9 Common Reasons)

Feb. 05, 2024
GE Oven F2 Error: Causes & Solutions

Jan. 03, 2024
How to Reset the Water Filter Light on a Samsung Refrigerator

Jan. 03, 2024
Maytag Washer Showing F5 Error Code? Here’s What To Do

Jan. 03, 2024


