

Fred's Appliance
February 10, 2020
Refrigerator Repair
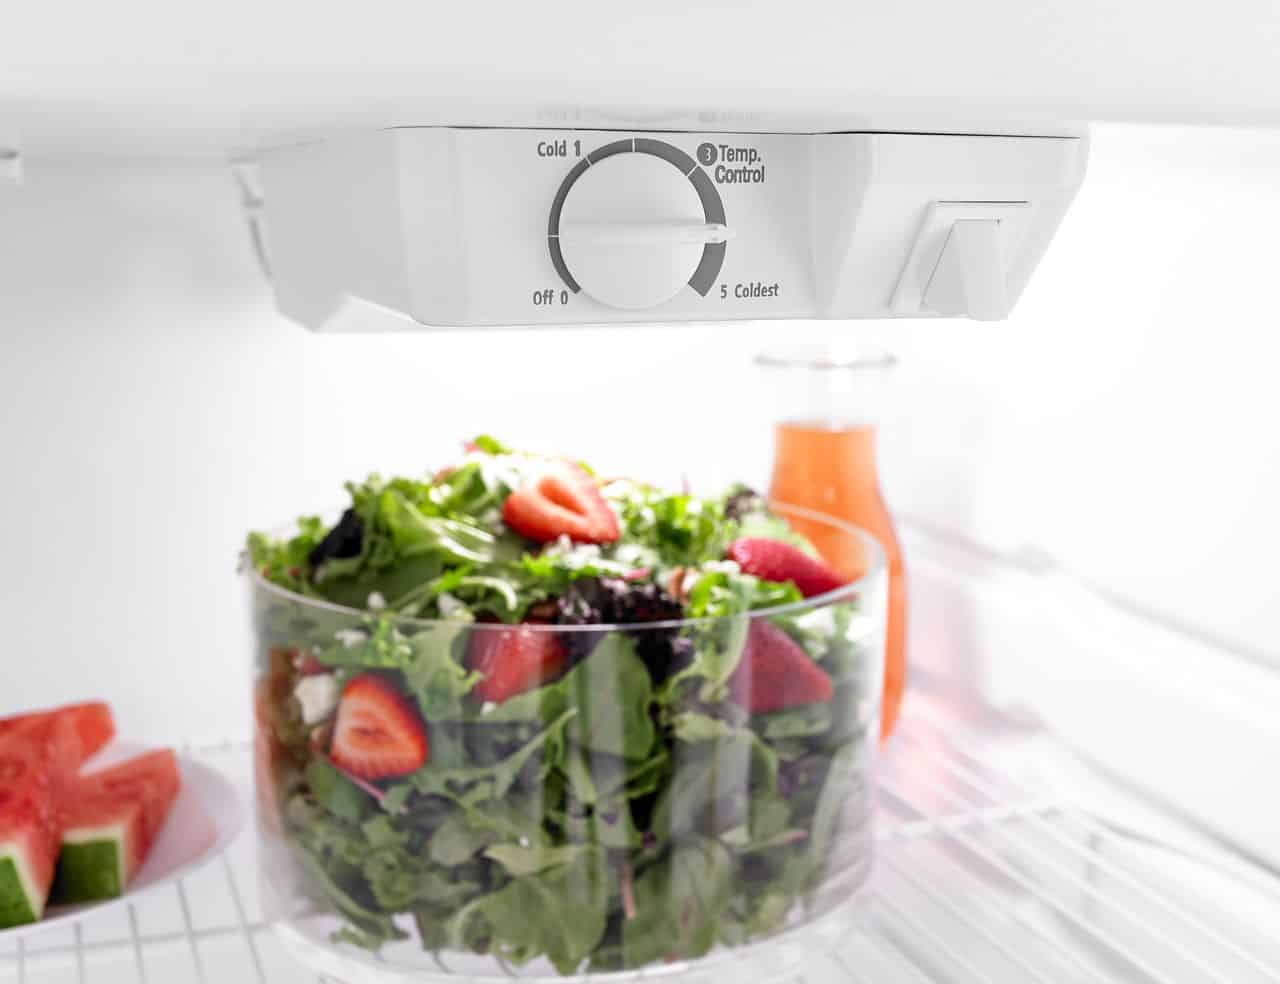
Most of the time we think of the refrigerator as something that takes care of itself. It continues to run at the same reliable temperature month after month, year after year, without needing any maintenance at all. At most, you wipe it down and maybe even clean the condenser coils from time to time, but the fridge hardly changes. Unless, of course, you need to reset the temperature control thermostat. The temperature controller in your fridge determines just how cold the refrigerator compartment can get.
Maybe you like it almost-icy, maybe you like your fridge a little warm. But when the fridge stops obeying your preferences or, starts cooling irregularly, there’s a problem. And it just might be with your temperature control thermostat. This little piece tests the temperature inside the fridge which allows your refrigerator to allow more or less cold from the freezer to blow through. So whether your milk is icing or spoiling, when the thermostat goes, it’s time for a quick replacement.
This guide will walk you step-by-step through replacing the temperature control thermostat of your refrigerator in less than 30 minutes.
Gather Your Supplies
This is a fairly simple repair, one that anyone can do with nimble fingers and a screwdriver. Of course, you’ll want to gather your tools before you begin so that you are ready to tackle each step of the repair as it comes. The most important part of this repair is the replacement control thermostat. You can find the right part by looking up the manual for the make and model of your refrigerator and it’s a list of replacement part numbers.
- Screwdriver
- Work Gloves
- Replacement Thermostat
- Cooler and Ice (optional)
Prep the Fridge for Maintenance
There are two things you need to do before the repair gets started. You will need to keep your food safe and you will need to cut the power.
- Put Highly Perishable Foods Into a Cooler
- First, understand that your fridge will be off and open for up to 30 minutes during this repair. Most foods will be safe but if you have anything highly perishable, you will want to put it into a cooler with ice or possibly your closed freezer compartment during this time. Do not open your freezer during this repair to help maintain the cold inside.
- Disconnect the Power
- This is an electrical repair so once your perishable food is secure, pull the plug on your fridge. Alternately, you can flip the breaker that powers the fridge to cut the power if you can’t easily reach the plug.
Disassemble the Temperature Control Panel
- Remove the Temperature Knob
- Pull the control knob off of the temperature control panel in your fridge. Set it aside for now.
- Unscrew the Control Panel Housing
- You will see several screws securing the control panel housing to the top or side of your fridge. Carefully remove each screw and catch the housing as it drops when you remove the last screw.
- Support the Housing with Something
- Find something to support the housing with so that it does not dangle from its wire. Like the milk, or a box of broth.
Remove the Thermostat
- Release the Brackets
- Removing the housing will have revealed the thermostat and its sensing tube held in brackets. Carefully pull back the brackets to release the two connected pieces.
- Remove the Thermostat
- Carefully pull the thermostat out of its bracket or catch the thermostat as it falls, depending on how loosely it is held.
- Remove the Sensing Tube – Save the Sleeve
- Now remove the sensing tube by opening it’s brackets and pulling it out or catching it.
- If the sensing tube is in a thermal sleeve, remove and keep the sleeve. Not all sensing tubes have sleeves.
- Take a Phone Photo
- There are several wires connected to the thermostat and they will need to go back on precisely. Take a phone photo as a visual reference and consider using small pieces of numbered or color-coded tape to remember where each wire goes.
- Detach the Wires
- You can now disconnect the wires from your control thermostat.
- Throw Away the Thermostat and Sensing Tube
- Throw away the thermostat and sensor tube or set them aside for electronics recycling later.
Install the New Temperature Control Thermostat
- Straighten the Sensor Tube
- When you unpackage the new temperature control thermostat, take a moment to straighten out the sensor tube.
- Transfer the Insulation Sleeve
- If there was an insulation sleeve you saved, place it over the new sensor tube now.
- Reconnect the Wires
- Reference your photo and possibly your notation tape to make sure each wire is connected to the new thermostat exactly the same way they were connected to the previous thermostat.
- Mount In the Brackets
- You are now ready to fit the new control thermostat and its sensor tube into the appropriate brackets. Press firmly until you feel the brackets click as the pieces settle into place.
Reassemble Your Temperature Controller
- Align the Temperature Control Housing
- Lift the temperature control panel housing back up into its proper place, but don’t twist in the screws yet.
- Coil in the Wires
- Before you attach the screws, take a moment to coil all the wires inside and make sure that no wire is being pinched or sticking out.
- Resecure the Mounting Screws
- Now hand-twist the first two screws to hold the housing in place before securing the entire lot with your screwdriver. Twist firmly but do not over-tighten.
- Return the Control Knob
- With that done, you can retrieve the control knob and set it (facing the correct direction) back onto the post.
Test Your Success
- Restore the Power
- Plug your refrigerator back into the wall or flip the breaker switch back on to restore power.
- Return Highly Perishable Items
- Empty your emergency cooler or retrieve your highly perishable items from the freezer compartment and return them to the fridge.
- Set the Temperature
- Set your fridge temperature to whatever you prefer and check the manual to see what temperature it is supposed to be at that setting.
- Place a Thermometer in the Fridge
- Place a fridge-safe thermometer into the refrigerator near the temperature control panel
- Wait an Hour
- Give your fridge at least an hour to reach its optimal temperature, then check back. If your ice is cold but not icy and the fridge thermometer is within five degrees of your preferred temp, then your repair was a success. Pat yourself on the back and find a way to celebrate your repair technician achievement.
Congratulations on your repair. For more repair guides or to schedule help from a professional technician, contact us today!
888-453-7337Text or ring! ring!
Live ChatClick to say hi

Apr. 09, 2024
How to Fix the nF Error Code on a Samsung Washer

Apr. 09, 2024
Kenmore Elite Dryer Issues: How To Troubleshoot

Mar. 06, 2024
Microwave vs. Oven: Pros and Cons and How They Differ

Mar. 06, 2024
Self-Cleaning Oven Smell: Causes & Odor Reduction Tips

Mar. 06, 2024
Frigidaire Ice Maker Not Working? 7 Ways to Fix It

Feb. 05, 2024
Why Is Your LG Refrigerator Not Cooling? (9 Common Reasons)

Feb. 05, 2024
GE Oven F2 Error: Causes & Solutions

Jan. 03, 2024
How to Reset the Water Filter Light on a Samsung Refrigerator

Jan. 03, 2024
Maytag Washer Showing F5 Error Code? Here’s What To Do

Jan. 03, 2024


