

Fred's Appliance
April 22, 2019
Washer Repair
One of the most important parts of your washing machine is the circulation pump motor. When this part isn’t operating correctly, the water isn’t circulating and your clothes come out of the wash and rinse cycles still dirty. If you want to replace this part yourself, order part #EAU61383503 for your LG washer. Once it arrives, follow these steps to get your washer back in working order:
1. Unplug the washer and turn off the two water connections.
The first step to any repair is unplugging the appliance. This is especially important when you need to disassemble the machine to reach the interior parts. Also, turn off the water connections to minimize the risk of a water leak and pull the appliance away from the wall.
Depending on the space you have available, you may also want to disconnect the water lines and pull the drain line connection out of the wall. During this repair, you will need to tilt the machine back to reach the circulation pump motor.
2. Disassemble the machine to remove the front access panel.
Locate the pump filter in the bottom left corner of the machine. Remove the door by opening it and popping the hinges free. Pull the black hose out of the clip and then remove the hose cap. There may be water, so have a towel ready to mop up moisture.
Next, remove the screw that secures the pump filter housing in place. Remove the housing. Then loosen the screw beneath that secures the front panel to the frame of the machine.
Remove the outer boot seal.
Open the door. Pry the wire clamp out. Pull the outer edge of the seal out from the edge of the front panel. Loosen the screw securing the door latch mechanism to the right side, and then reach past the seal around the back of the front panel to pull the mechanism inside the machine and out of the way. Then close the door.
After that, remove the top access panel. Go to the rear of the machine and remove the two screws holding the top panel to the rear brackets. Slide the top panel back and lift it up. Set it aside.
Then remove the dispenser drawer at the top left corner of the control panel. You may have to reach into it to depress the back tab. Then remove the screw holding the housing in place and push the housing inside away from the front panel.
Move on to removing the control panel. To start, remove the screw located at the right interior side of the control panel. Loosen the ties holding the lengths of wires flush and together against the control panel. Unplug the three wire harnesses.
Next, peel the control panel away from the front panel starting on the top right corner. Once the top is loose, tilt it forward so you can carefully pull the wires out of cutout and set it aside.
Lean against the door and front access panel to hold them in place. Then remove the screws along the top of the front access panel where the control panel used to be. Tilt the panel forward, lift free of the bottom groove, and set it aside.
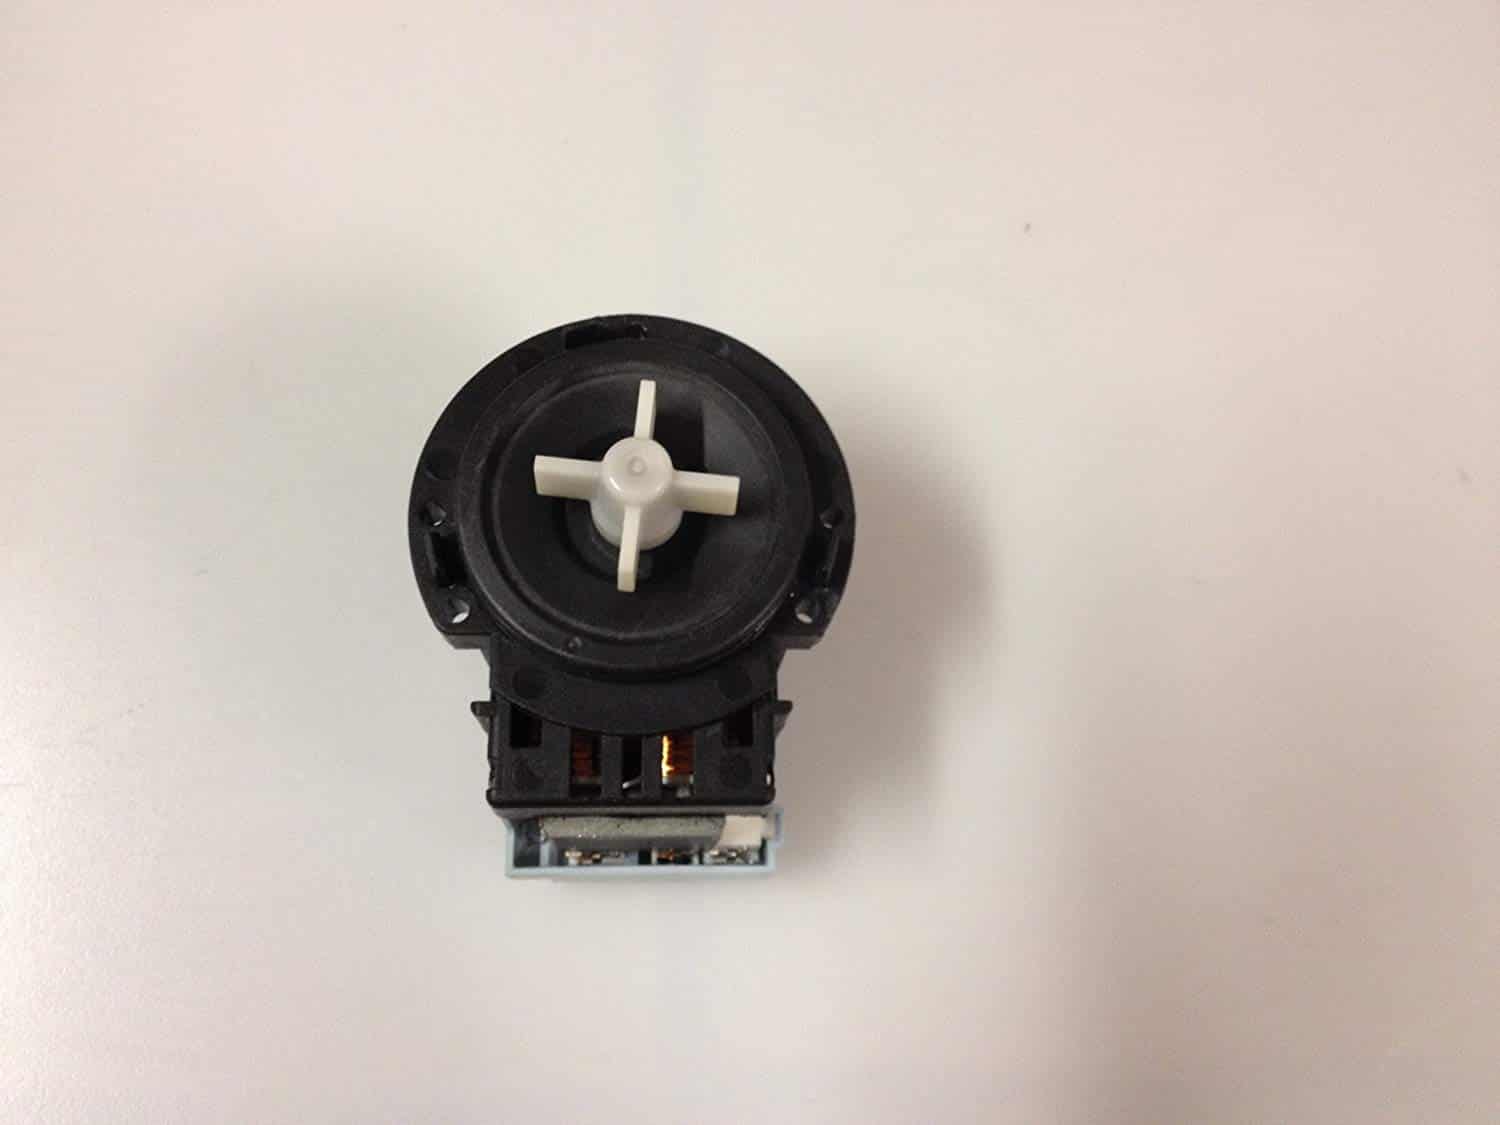
3. Remove the old circulation pump motor.
Locate the circulation pump motor in the bottom left corner to the right of the green and cream hoses.
Before you start removing parts, set a box behind the washer and tilt the machine back at a forty-five-degree angle so you can easily reach the parts. Don’t pinch the hoses and drain lines on the back.
Next, remove the two-wire harnesses from the assembly. Also, remove the retaining clip from the assembly. Remove the three screws that hold the pump motor up against the housing. The whole part should now come out. If you’re nervous about realigning the screws and wires during reassembly, take a picture before you get started so you have an exact guide.
4. Install the new circulation pump motor.
Now that the old part is out of the washer, remove the protective shield from the part and snap it into place around the new circulation pump motor.
Orient the new pump motor so the seal fits into housing. Press it into place and re-secure all three screws.
Next, reattach black and blue wires according to your picture (with the black wire on the bottom or right port and the blue wire on the top or left port) and make sure the excess lengths of the wires are securely held in place in the retaining clip.
5. Reassemble the washer.
First, pull the washer back into a standing position so it’s upright. Next, reattach the front panel by setting it on the bottom groove. Tilt it flush with the front of the panel.
Lean against it to hold in place as you secure the top in place with the screws.
After that, reattach the control panel. Set bottom edge against the frame and slide the wires through the cutout. Tilt the panel up flush against the frame and snap the locking tabs shut. Tighten the screw in the top right corner inside the machine.
Then reattach the two wire harnesses on the interior sides of the machine. Then slip the wires back against the back of the control panel and tighten the ties to secure the wires.
Next, push the dispenser housing back into position in the front opening and secure it in place with the two screws. Push the drawer back into position and close it.
Set the top panel on top of the machine, but make sure an inch or so hangs over the back edge. Slide it along the rails so it snaps into position under the front edge of the control panel. Retighten the two screws on the back bracket. Go to the front of the machine. Push the door switch assembly back through the cutout on the right side of the door opening and secure the mechanism with the two screws. Pull the seal back into place around the opening. Press the edges into the groove and run your hand along the whole circumference to check for gaps or loose sections. You should hear it snap into place along the lip.
Next, install wire the clamp into the groove. Orient the spring at the bottom and work counterclockwise from there to press it into the groove. Once it’s too tight to pull into position by hand, use pliers to stretch the spring and push the extended wire into place around the remainder of the circle. Tug on the seal to make sure it’s secure. The clamp and the spring should be invisible. Then shut the door.
After that, reattach the screw in the filter pump cutout to hold everything back in place. Then replace the housing and attach it with the second screw. Reattach the drain hose lock to the black hose and fold the hose back up into the retaining clip. Reattach the door by snapping the hose into position.
If you disconnected the water lines, retighten them to the inlets on the back of the machine and reinsert the drain hose to the connection in the wall. Turn on the two water connections, push the washer back into position, and plug the washer back in.
For more repair guides and troubleshooting advice, contact our team at Fred’s Appliance Service.
888-453-7337Text or ring! ring!
Live ChatClick to say hi

Apr. 09, 2024
How to Fix the nF Error Code on a Samsung Washer

Apr. 09, 2024
Kenmore Elite Dryer Issues: How To Troubleshoot

Mar. 06, 2024
Microwave vs. Oven: Pros and Cons and How They Differ

Mar. 06, 2024
Self-Cleaning Oven Smell: Causes & Odor Reduction Tips

Mar. 06, 2024
Frigidaire Ice Maker Not Working? 7 Ways to Fix It

Feb. 05, 2024
Why Is Your LG Refrigerator Not Cooling? (9 Common Reasons)

Feb. 05, 2024
GE Oven F2 Error: Causes & Solutions

Jan. 03, 2024
How to Reset the Water Filter Light on a Samsung Refrigerator

Jan. 03, 2024
Maytag Washer Showing F5 Error Code? Here’s What To Do

Jan. 03, 2024


