

Fred's Appliance
May 6, 2024
Dishwasher Repair
Since caps and other hats are designed to be worn daily, whether it’s to keep the sun out of your eyes or hide a bad haircut, they are prone to becoming a bit dirty or stained.
Therefore, it’s a good idea to clean your hats occasionally to freshen them up and keep them looking vibrant. One method of cleaning hats that is becoming increasingly popular thanks to its convenience is using the dishwasher.
That’s what we’ll be covering today: How to wash a hat in the dishwasher in five simple steps.
Warning: Some hats aren’t suitable for the dishwasher.
Check the manufacturer of your hat to ensure this niche method of cleaning will work.
Before we get going with the five-step instructions, a quick word of warning: Not all hats are durable enough for the dishwasher.
This includes hats made of wool, leather, lace, suede, silk, fur, or other fabrics that may be damaged by the heat or powerful water jets. Also, hats with glued-on or fragile decorations are unsuitable because these may fall off.
Likewise, it’s generally not a good idea to put hats in the dishwasher that are vintage, expensive, or have a lot of sentimental value. Finally, hats with a cardboard brim or a defined shape, such as a trilby, are not suitable for the dishwasher. Instead, wash these types of hats by hand or use a professional cleaning service.
So, what are the ideal hats to wash in the dishwasher? Caps, canvas hats, or bucket hats that are made from durable cotton, polyester, or nylon fabric.
5 simple steps to wash your hat in the dishwasher
Okay, now that you’re sure you can wash your hat in the dishwasher, here’s how to do it:
Step 1: Empty the dishwasher
For the best results, empty the dishwasher first. While some people do throw their hats in alongside the dirty dishes and cutlery, there is a risk that food and grime from these may end up on your hat.
This is especially true if the plates and dishes are heavily soiled and have not been pre-rinsed. If you empty the dishwasher beforehand, you’ll remove this risk and ensure you get the best results.
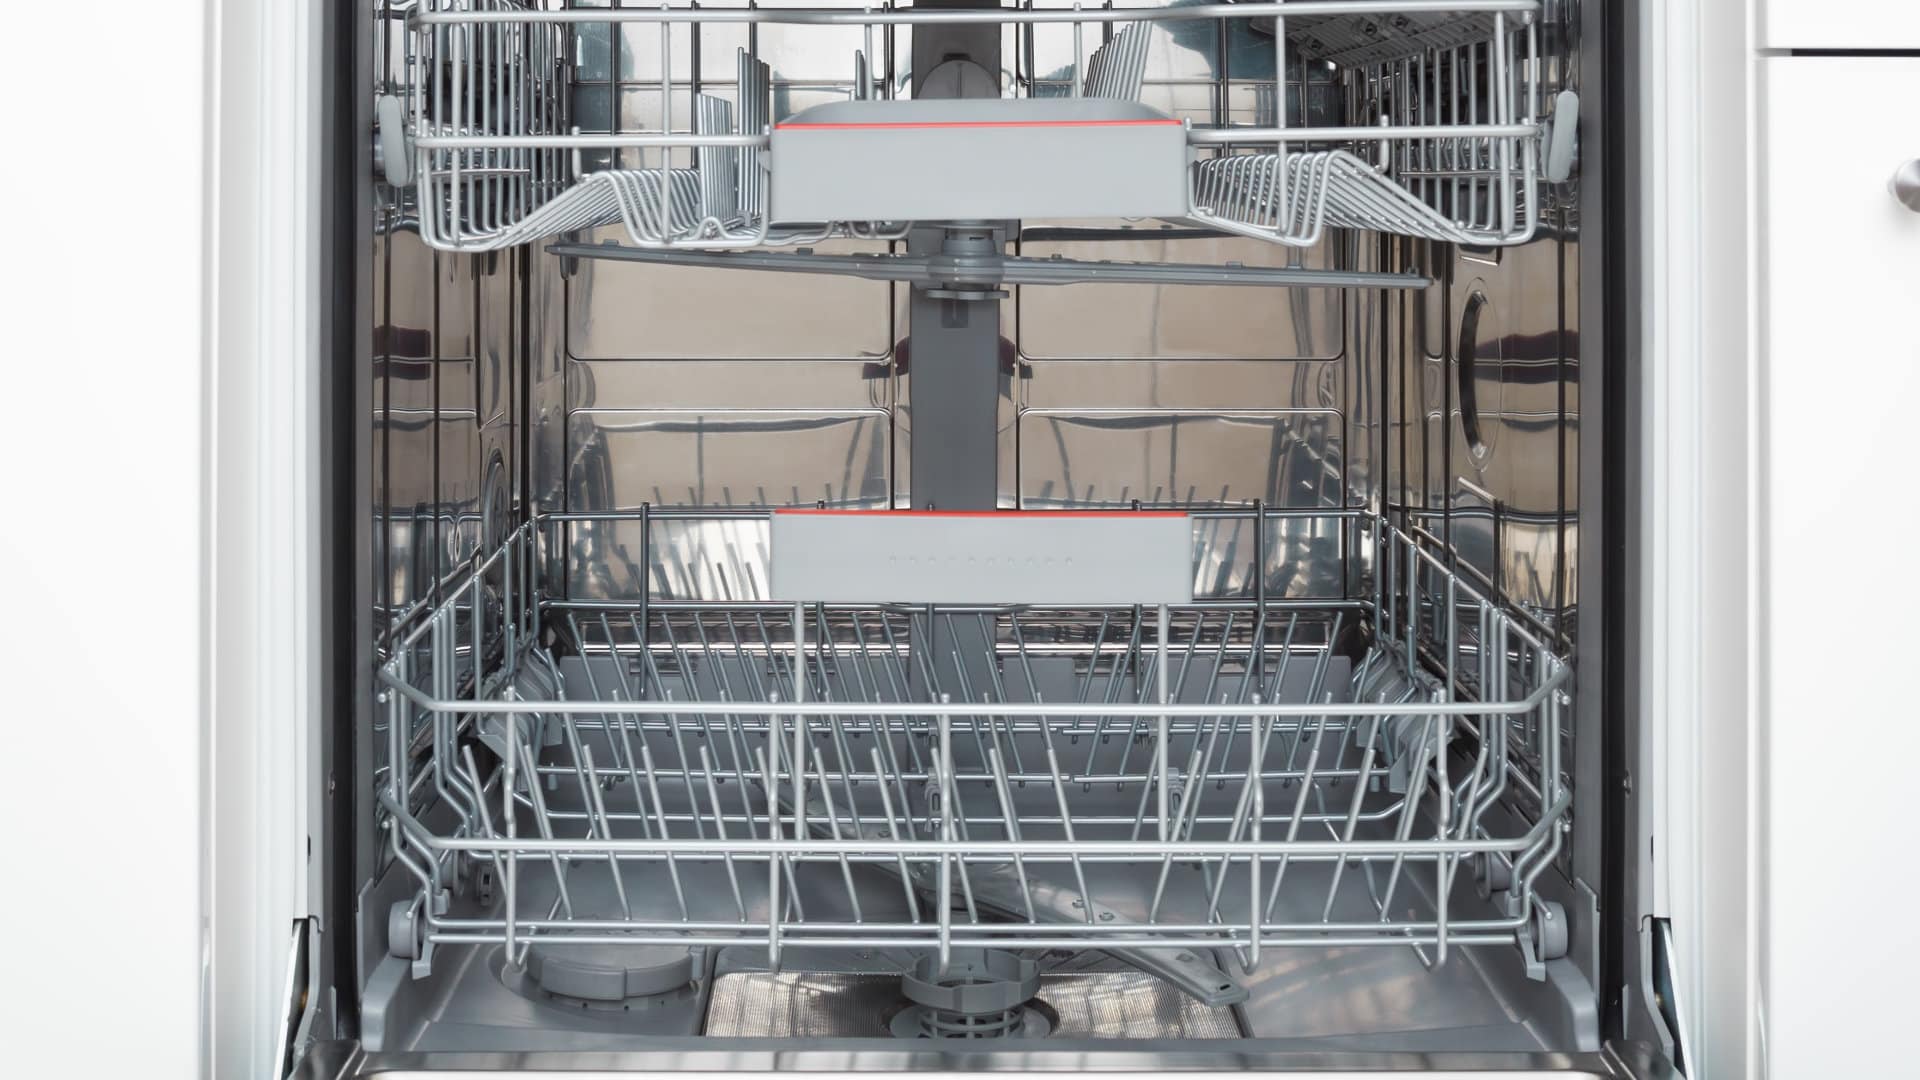
Step 2: Place your hat on the top rack
By placing your hats on the dishwasher’s top rack, you can achieve a gentler wash, reducing the risk of damage. That’s because the heating element is typically at the bottom of a dishwasher, and fewer water jets target the top rack.
You can wash one or multiple hats per cycle. Just ensure they are spread evenly across the top rack with a slight gap between each hat.
For those worried about their hat losing its shape, you can buy a plastic “cap cage” online or from some retailers. They are not too expensive. These special cages provide a supportive frame that ensures your cap retains its shape throughout the wash.
Step 3: Add the detergent
What often surprises people is that you should use regular dishwasher detergent; not laundry detergent. That’s because your dishwasher is designed to use dishwasher detergent, so using other types of soaps could damage it.
Dishwasher pods, powder, or liquid will all do a fine enough job and won’t harm your hat. Just make sure to check beforehand that the detergent you use doesn’t contain bleach. Bleach could discolor brightly colored and dark hats. You can easily verify that your detergent doesn’t contain bleach by looking at the ingredients list.
Some people do use a tablespoon of borax instead, so this is an option if you don’t want to use dishwasher detergent. Borax won’t harm your dishwasher; it will clean your hats effectively and remove odors.
Step 4: Run the dishwasher
Just like placing your hat on the top rack provides a slightly gentler wash, most modern dishwashers have a wash cycle option that provides a more delicate wash.
Often these gentler wash cycles have names like “Eco,” “Light,” “Gentle,” or “Delicate,” but refer to your user manual to see which ones are available on your machine. What you’re looking for is the cycles with a lower temperature and gentler washing action.
Also, if possible, you’ll want to turn off the automatic drying feature, as this uses excessive heat to dry the contents of your dishwasher after a cycle. Instead, opting for air drying is the safest option.
These types of cycles and settings will help protect your hats from damage, such as shrinking, fading, or becoming misshapen. Once you’ve configured your dishwasher to the right settings, run the cycle to clean your hat.
Step 5: Dry your hat
Rather than dry your hat with the dishwasher or a tumble dryer, it’s better to let it air out naturally after the wash cycle is finished. This way, you won’t get any shrinkage or misshaping.
To allow your hat to air dry, simply pop it over an upturned bowl and leave it at room temperature for several hours in a well-ventilated area. Placing it over an upturned bowl will ensure it keeps its correct shape.
There’s no need to place it in direct sunlight to speed up the drying process, as this will just lead to premature fading of your hat’s color. However, you can use a fan if you like.
Final thoughts
Using a dishwasher is absolutely one of the most convenient ways to clean a hat. It saves you the hassle and burden of hand cleaning, and it does a superb job while still being gentler than using a washing machine.
However, it’s important to follow the steps outlined in this guide, such as placing the hat on the top rack, using the right detergent, air drying it, and using a gentle wash cycle to avoid unnecessary damage to your hat or dishwasher.
888-453-7337Text or ring! ring!
Live ChatClick to say hi
May. 06, 2024
Whirlpool Washer Error Codes Explained
May. 06, 2024
How to Wash a Hat in the Dishwasher (In 5 Steps)

Apr. 09, 2024
How to Fix the nF Error Code on a Samsung Washer

Apr. 09, 2024
Kenmore Elite Dryer Issues: How To Troubleshoot

Mar. 06, 2024
Microwave vs. Oven: Pros and Cons and How They Differ

Mar. 06, 2024
Self-Cleaning Oven Smell: Causes & Odor Reduction Tips

Mar. 06, 2024
Frigidaire Ice Maker Not Working? 7 Ways to Fix It

Feb. 05, 2024
Why Is Your LG Refrigerator Not Cooling? (9 Common Reasons)

Feb. 05, 2024
GE Oven F2 Error: Causes & Solutions

Jan. 03, 2024


