

Fred's Appliance
January 7, 2019
Microwave Repair
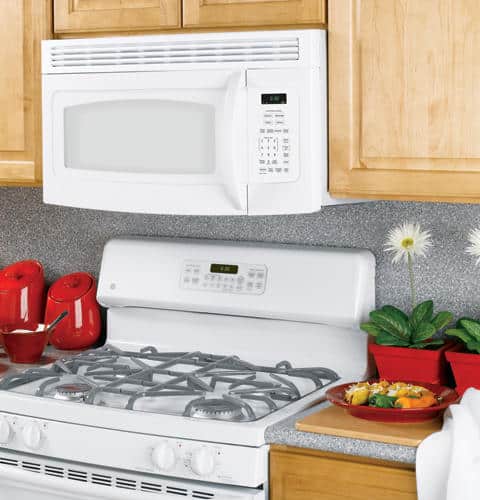
Nothing beats the convenience of warming or cooking your food in a microwave, especially when your day is jam-packed with work and family. Unfortunately, after years of use, your GE microwave model JNM1541DPWW can start emitting loud and concerning sounds. If a humming, grinding, or whining noise is coming from your appliance, the repair guide provided below can help you pinpoint and replace the malfunctioning component.
Discharging the High Voltage Capacitor
Warning: Microwaves maintain a large amount of electricity after they are unplugged. Which is why, replacing internal components without the proper training is extremely dangerous. If you are not a professional appliance repair technician, please contact one to perform internal repairs.
Your microwave is equipped with a high voltage capacitor, which makes the appliance capable of shocking you even after you have unplugged it. The high voltage capacitor stores large amounts of electricity and must be discharged before you attempt to repair your appliance. If you do not feel comfortable performing this task, or you do not have adequate experience, we recommend hiring a trained appliance repair technician to repair your microwave. However, if you do plan on discharging the high voltage capacitor, the steps below will help you.
- Before starting, make sure you are wearing work gloves and safety goggles. Unplug your microwave, and if it’s mounted to your cabinetry and wall, uninstall it and place it on a flat surface. Then, open the microwave door, and take out the microwave’s glass tray and support.
- Using a Phillips screwdriver, unthread the mounting screws holding the grill to the microwave. Then, slide the grill over and lift it up and off your appliance.
- Carefully lay your microwave on its rear panel, and unthread the screws attached to the appliance’s bottom panel. Then, disconnect the wire harness and pull the panel off your microwave.
- Next, stand your microwave back up, and remove all the screws securing the microwave cabinet to the appliance. Once the screws are out, take the cabinet off the microwave.
- Now locate the high voltage capacitor. To discharge the capacitor, use an insulated pair of needle nose pliers. Touch the metal ends of the pliers to the capacitor’s terminals at the same time. Make sure you do not touch the metal on the pliers with your hands. When the metal touches the terminals you will hear a loud pop. Continue to hold the pliers in place for a few seconds. You may want to perform this task a couple of times to ensure the high voltage capacitor is fully discharged before you move on to repairing your microwave.
The Magnetron
All microwaves are equipped with a magnetron. The magnetron generates the microwave frequency, which in turn creates the heat that warms or cooks your food. A properly functioning magnetron emits a low hum during operation. When the magnetron is failing that hum can turn into a high pitched hum or a growling sound. If the magnetron in your microwave is faulty, it will need to be replaced. However, if you do not have experience working on a microwave’s internal components, we suggest hiring a trained repair technician to complete the job.
How to Replace the Magnetron in Your GE Microwave
- Once you have followed the directions above and discharged the high voltage capacitor, you can locate the magnetron and start the replacement process. To do so, first, disconnect the wires running to the magnetron. Then, unthread the mounting screws securing the component to the inside of the microwave. Next, pull the magnetron out of the microwave slightly, and detach the wires running to the thermal protector. Now you can completely remove the failing magnetron from your appliance.
- Before you can install the new magnetron, you need to take the thermal protector off the old component. Once the thermal protector is no longer attached to the defective part, retrieve the new magnetron and attach the thermal protector to it.
- Now you can install the new magnetron. Begin by reconnecting the wires to the thermal protector. Then, align the magnetron with its mounting bracket, and rethread the screws that hold the part in place. Lastly, reattach the wire connector that runs to the component.
- With the new magnetron in place, you can start reassembling your microwave. First, reattach the microwave cabinet and secure it with all the screws you took out earlier. Next, lay the microwave down and reinstall the bottom panel. Don’t forget to reconnect the wire harness you disconnected during the disassembly process. Once the bottom panel is reattached, stand your microwave back up, and reconnect the appliance’s grill. Then, open the microwave door, and replace the glass tray and support.
- After you are done reassembling your microwave, you can reattach the appliance to the mounting brackets on your wall and cabinet.
The Drive Motor
Your microwave’s drive motor rotates the appliance’s glass tray. If you hear a grinding noise as the tray is turning, a failing drive motor is most likely the problem. The only way to get rid of that annoying noise is by switching out the faulty drive motor for a new one.
How to Replace the Drive Motor in Your GE Microwave
- For this repair you do not need to discharge your microwave’s high voltage capacitor, but you still must unplug your appliance before you begin the replacement process.
- Once your appliance is no longer plugged in, use a Phillips screwdriver to unthread the screws securing the bottom panel to the microwave. Then, lower the bottom panel and allow it to hang from the back of the appliance.
- Detach the wire harness running to the motor and take out the screw holding the drive motor to the bottom of the microwave. Once the screw is loose, rotate the motor clockwise and pull it off the drive coupler.
- Grab your new drive motor and push the shaft into the opening in the drive coupler. Rotate the component counterclockwise to slide the tabs on each side of the motor into the slots on the bottom of the microwave. Then, rethread the mounting screw to secure the part, and reconnect the motor wire harness.
- Close the bottom panel and reinstall the screws you removed earlier.
- Plug your microwave back in and warm up some food to ensure the repair got rid of the grinding noise plaguing your appliance.
While the magnetron and the drive motor are two of the more common causes of a loud microwave, there are other faulty components that can lead to the same symptoms. If you’re not sure what part is malfunctioning in your microwave, please contact us today and one of our highly trained appliance repair technicians will be happy to diagnose and repair the unusual sound coming from your microwave.
888-453-7337Text or ring! ring!
Live ChatClick to say hi

Apr. 09, 2024
How to Fix the nF Error Code on a Samsung Washer

Apr. 09, 2024
Kenmore Elite Dryer Issues: How To Troubleshoot

Mar. 06, 2024
Microwave vs. Oven: Pros and Cons and How They Differ

Mar. 06, 2024
Self-Cleaning Oven Smell: Causes & Odor Reduction Tips

Mar. 06, 2024
Frigidaire Ice Maker Not Working? 7 Ways to Fix It

Feb. 05, 2024
Why Is Your LG Refrigerator Not Cooling? (9 Common Reasons)

Feb. 05, 2024
GE Oven F2 Error: Causes & Solutions

Jan. 03, 2024
How to Reset the Water Filter Light on a Samsung Refrigerator

Jan. 03, 2024
Maytag Washer Showing F5 Error Code? Here’s What To Do

Jan. 03, 2024


