

Fred's Appliance
November 19, 2020
Refrigerator Repair
Freezers are the food version of deep storage. Aside from a few weekly frozen treats, the freezer Is where we stash food that we want months from now or ingredients we use very slowly. So it’s no wonder that the freezer is rarely cleaned out. Between the occasional spill, exploded soda, and constant frost buildup, it can be pretty tough to just run a sponge through your freezer for good measure.
Most freezers need a good scrub, and it’s more than a little challenging to make time for the whole process. Not only do you need to store your frozen foods elsewhere, you also have the built-up ice to contend with. The good news is that you don’t have to wait for a defrost cycle or manually defrost your freezer to get it clean. With the right supplies and process, you can have a spotless freezer in 30 minutes or less, food safely still frozen and back in its place.
Gather Your Cleaning Supplies
The first step is to get your supplies ready. You should have all or most of these things handy around the house. If you don’t have a cooler, now is a good time to get one or grab a disposable styrofoam cooler for this one-time use. You will need either pre-frozen ice packs or a standard 10-pound bag of ice to fill your cooler and keep it cold.
Your freezer cleaning supplies is the standard lot, with a special addition of hot water and an emphasis on towels. Have a pitcher and tap-hot water should be sufficient.
- Medium to Large Cooler
- Ice Packs or Sack of Ice
- Pitcher of Hot Water
- Towels
- Sponges
- Dish Soap
- Surface Cleaner
Transfer Freezer Goods Into a Cooler
Open your freezer and begin transferring items into the cooler. If the items are sticky, wipe them down with hot water and quick swipes of the sponge. The goal is to clear away the sticky residue without melting the cardboard, if possible. Place all items into the cooler tightly together, then pack them in with ice packs. If you bought a sack of ice, pour the ice cubes over the freezer items. You can also choose to split the ice, creating a bed of ice, loading the freezer items, and then covering them over.
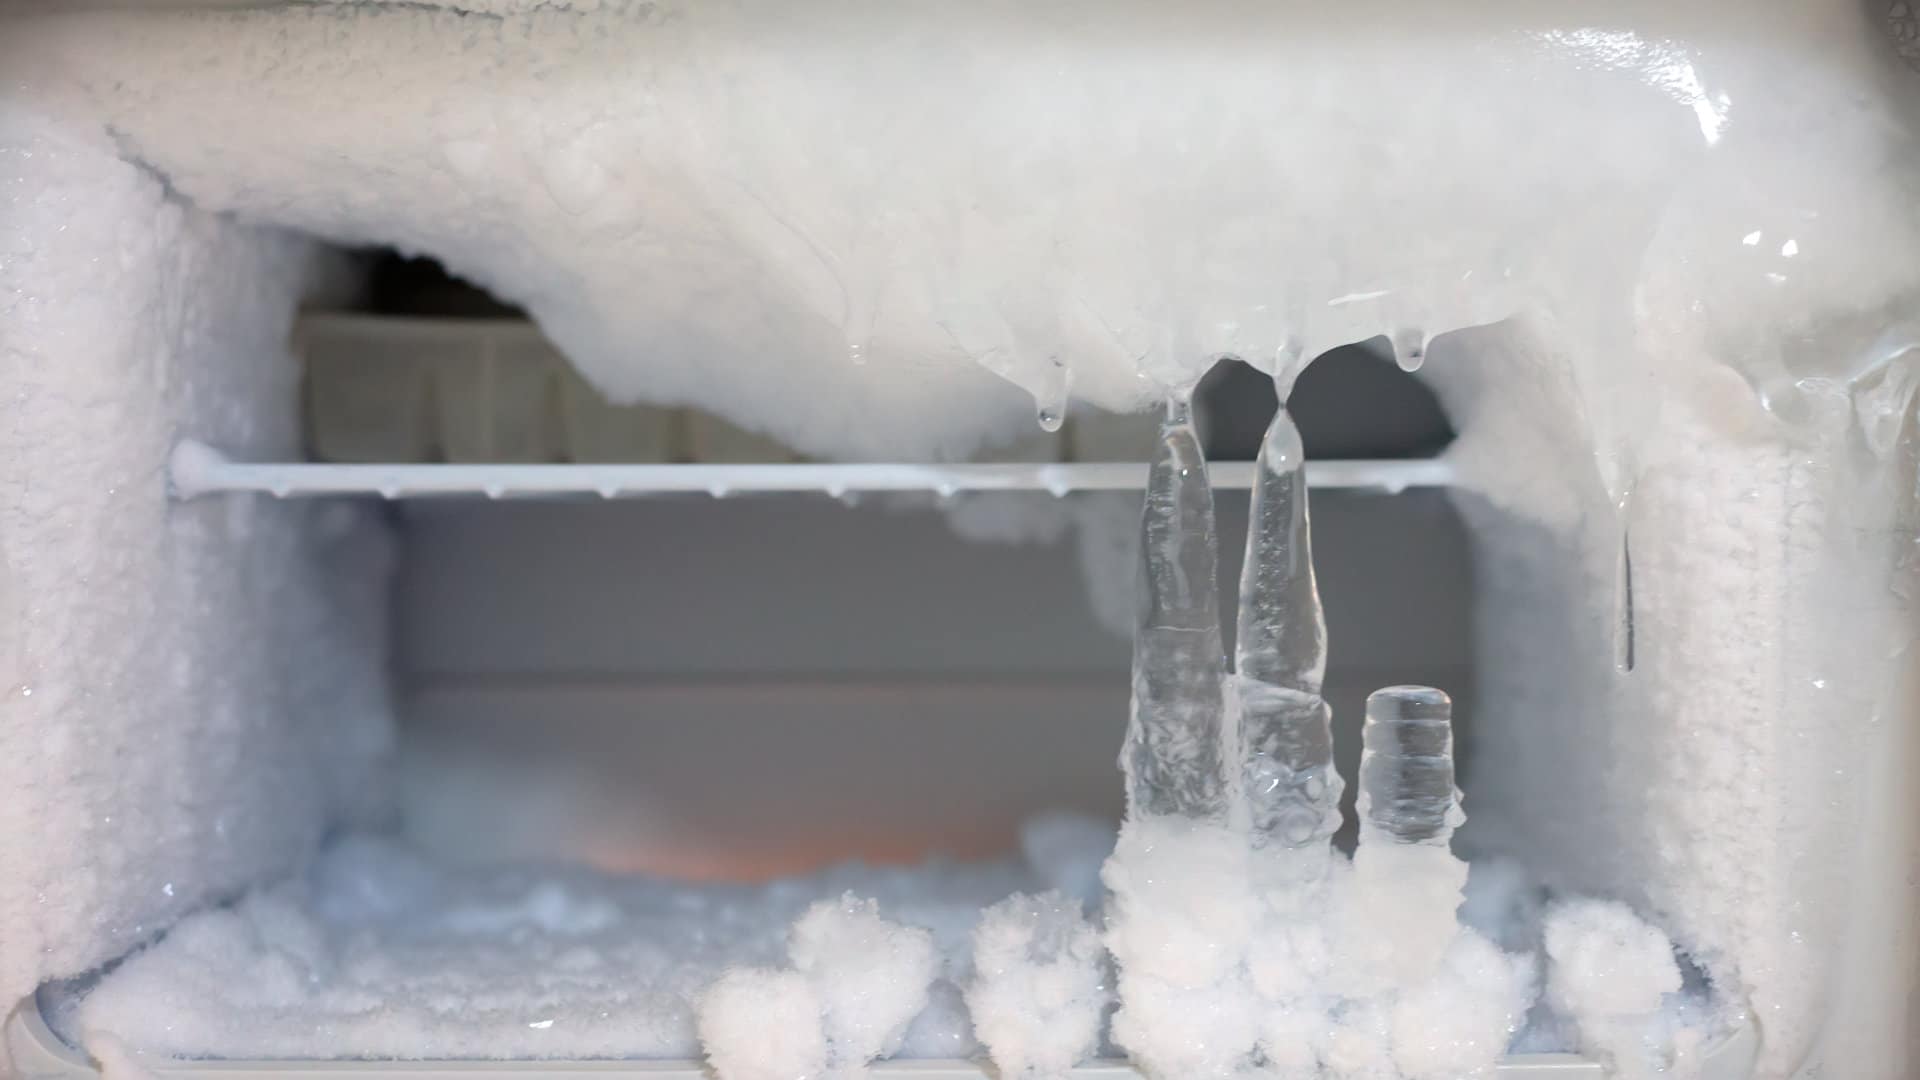
Use Hot Water to Melt Wall Ice
Now that your freezer is empty, you’re looking at fluffy-sharp ice built up on the walls, ceiling, and possibly the floor of the freezer. This ice buildup takes up space and is bad for your freezer food. Get rid of it without defrosting by using your pitcher of hot water. Place a folded or rolled towel along the base/entrance of the freezer floor. Then pour hot water over every ice mound and watch them melt. When you get to the close-ice directly on the walls, use a measuring cup or short drinking glass to pour water down the sides of the freezer.
Catch the water with the towel and let it soak up the excess. When one towel is soaked, hamper it and roll up another towel if there’s more ice to melt.
Soak & Scrub Sticky Frozen Puddles
Once all the ice is gone, a good deal of the mess should have washed away as well. But frozen puddles can be particularly tough to clean. Drips and exploded sodas alike can create a frozen jam-like substance that is tough to drag a sponge through. Soaking is your friend here. Use one of your towels soaked in hot water and press it down into the puddle. You can chisel, scrape, or scrub the puddle away as it breaks up. If the towel soak doesn’t work, keep pouring over hot water as you scrub away the residue. This method combined should be able to get rid of any built-up residue inside your freezer compartment.
Spray & Wipe the Plastic Walls
Now it’s time for the surface cleaner. With everything serious already cleaned out, you’re ready to polish the plastic and get it food-ready again. Use your surface cleaner to spray down the entire interior surface of the freezer. Let it drip for thirty seconds while the disinfecting qualities of the spray take effect. By waiting, you ensure that your freezer is completely sanitized and ready to hold food again, no matter what it was that you just scrubbed away.
When the surface cleaner has sat, use a clean towel or sponge to wipe it out. Rinse your sponge and then rinse the inside of the freezer one more time with clean water. Dry the inside of the freezer with a dry towel so that it is completely clean, dry, and ready for the frozen food.
Wipe Down the Door, Handle, and Exterior
Before you reload, stop and also clean the outside of your freezer. Spray the exterior surfaces of your fridge and/or freezer with the surface cleaner and let it sit for a few seconds. Wipe away the surface cleaner and pay special attention to the door. Spray down the door and handle, then scrub the handle as you wipe away the cleaner. The door handle is the single dirtiest part of the fridge, aside from any interior spills or mold cultures.
This makes sure that even the outside of your freezer is clean enough to safely touch food so that fumbles and slides are still kitchen-safe.
Reload the Freezer with Frozen Goods
Finally, you are ready put your freezer back together. Take this opportunity to reorganize how you arrange your freezer items. Place things you want frozen-solid near the back and the things you want a little melty toward the front. Don’t block the vents with boxes (or anything else) and consider your quick-grab plans for accessing your frozen foods in the near future.
—Now you should have a spotless freezer interior and exterior, without frost and free from those sticky spills that were so hard to clean up before. You can use this method every few months to ensure your freezer looks great. Contact us today for appliance repair and maintenance services!
888-453-7337Text or ring! ring!
Live ChatClick to say hi

Apr. 09, 2024
How to Fix the nF Error Code on a Samsung Washer

Apr. 09, 2024
Kenmore Elite Dryer Issues: How To Troubleshoot

Mar. 06, 2024
Microwave vs. Oven: Pros and Cons and How They Differ

Mar. 06, 2024
Self-Cleaning Oven Smell: Causes & Odor Reduction Tips

Mar. 06, 2024
Frigidaire Ice Maker Not Working? 7 Ways to Fix It

Feb. 05, 2024
Why Is Your LG Refrigerator Not Cooling? (9 Common Reasons)

Feb. 05, 2024
GE Oven F2 Error: Causes & Solutions

Jan. 03, 2024
How to Reset the Water Filter Light on a Samsung Refrigerator

Jan. 03, 2024
Maytag Washer Showing F5 Error Code? Here’s What To Do

Jan. 03, 2024


