

Fred's Appliance
September 10, 2018
Refrigerator Repair
If your LG refrigerator or freezer is too warm, that’s a strong sign that something is wrong with the cooling system. One of the most common culprits is a broken evaporator fan motor, and it will make a lot of noise when it’s not operating correctly.
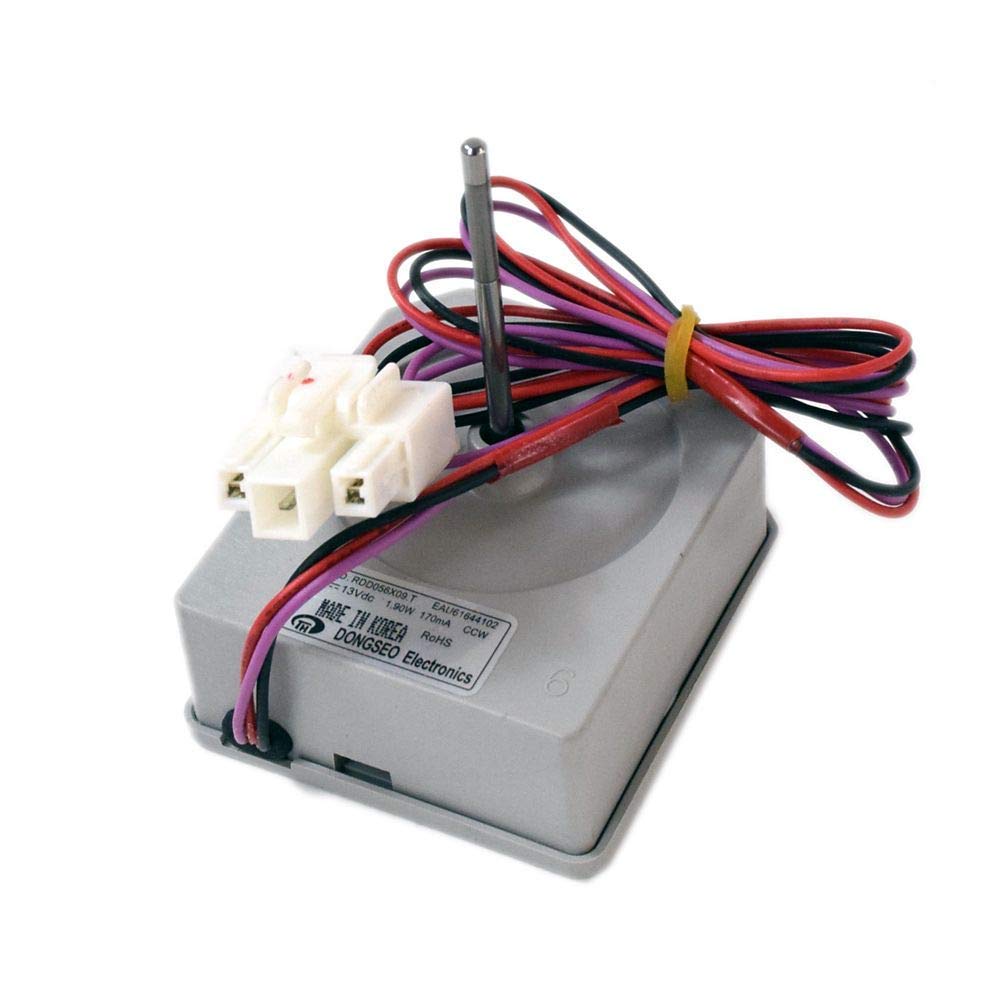
If you like handling your own appliance repair, this is a repair job that requires a lot of disassembly but no special tools. All you need to do is order a replacement evaporator motor, replacement part #EAU61644102 for LG models, and follow these instructions:
1. Unplug the refrigerator.
Before you start any appliance repair, always make sure the appliance is unplugged or its circuit breaker is flipped. Most machines hold a charge even when they’re turned off. This repair procedure requires you to unplug internal electrical components, so unplugging your refrigerator is even more important.
2. Dismantle the freezer section.
The evaporator fan is located in the back of your freezer section, behind the back cover plate. The easiest way to reach it is by removing that back cover.
First, pull out the loose parts. This includes the ice machine bucket, sliding shelves, and any baskets in the section. Set them aside. Next, remove the ice machine itself.
Start by loosening the two screws on the left side panel where the ice machine is hanging. The two screws are supporting the machine. Remove the left one entirely so it hangs at an angle and partially loosen the right screw. Then lift up the ice machine and swing the hanging tabs free of the screw. Next, use a flathead screwdriver to pry the wire harness apart. Then remove the ice machine entirely and set it aside.
Remove the loosened right screw, as well as the three screws holding the left rail. Lift the left rail free of its mounting tabs and remove it. Also, remove the cover plate behind ice machine: it is secured in place by screws and two mounting tabs. Because there are wires threaded through it, you can’t fully remove it. Instead, slide the small cover plate back through the back plate for now.
Now you can remove the back panel. First, locate the tabs holding the back plastic panel in place at the side and top. Grab the panel near each tab and snap it free. This will loosen the panel. Twist it to the left so you have room to pull it completely away. Set it aside.
The internal parts of the freezer section are now visible along the back of the machine. Unplug motor connector wires on the left side. Next, remove the mounting brackets holding up the fan assembly. Take the bracket out of the appliance and set it on a flat work surface.
3. Uninstall the evaporator fan motor.
The mounting bracket is a wide plastic piece that has the evaporator fan in the center. Pry the fan blades assembly away from the center shaft.
Remove the wires from the retaining clips and push the wires to the side where they can’t be damaged. Next, loosen the two screws holding the fan motor’s top cover support in place and set aside. Then you should be able to fully remove the evaporator fan motor. Before you start installing the new part, remove the grommet from the back of the motor so you can reuse it on the replacement part.
4. Install the new evaporator fan motor.
Insert the old grommet on the back central shaft on the motor. Then slide the motor assembly into place on the plastic mounting bracket. Slide the top cover over the shaft on top of the motor, then secure it in place by tightening the two screws. If the length of wire is excessive, use a rubber band to secure the wires halfway between the retaining clip and the wire harness. This will reduce the risk of accidentally pinching or cutting the wires during reassembly.
Secure the motor’s wires to the mounting bracket twice: once with a zip tie, and the second time in the retaining clip on the side. Next, slide the fan blades over the central shaft.
5. Reassemble the refrigerator.
First, position the bracket against the back of the appliance so the insulation strips match the marking on the back. Tighten the screws to secure it in place. Next, reattach the wire harness.
Slide in the back panel. Start by sliding the bottom of the panel into the groove, then push the sides into position. The locking tabs should click when it is fully in position.
Next, retrieve the cover plate from between the machine’s back and the back cover plate. Position it in the hole and firmly press it into place against the locking tabs. Rethread the screws to secure it.
After that, reattach the left railing. The tabs should snap it straight into position. Add the screws you removed earlier to provide additional support.
Then halfway tighten the right support screw for the ice machine. Don’t tighten it flush with the wall because you need part of the length of the screw to hang the ice machine from. Next, reconnect the wire harness. Then hang the ice machine onto the right screw, tighten it and then fully reattach and tighten the left screw.
Add the bins and shelves back into place. Also, slide the ice machine bucket into place. Make sure the ice machine is turned on by flipping the wire into the ‘on’ position so you can begin to refill the ice bucket. Plug the refrigerator back in.
Even once the evaporator fan motor has been replaced, the freezer section needs a full day to cool back down properly and maintain its low temperature. It needs twenty-four hours to fill the ice bucket, which is the best test to ensure the new fan motor is working.
If you have more major appliances that you want to repair or tune-up, go to Fred’s Appliance Service here. You can find more major appliance repair procedures, troubleshooting tips, and general appliance advice.
888-453-7337Text or ring! ring!
Live ChatClick to say hi

Apr. 09, 2024
How to Fix the nF Error Code on a Samsung Washer

Apr. 09, 2024
Kenmore Elite Dryer Issues: How To Troubleshoot

Mar. 06, 2024
Microwave vs. Oven: Pros and Cons and How They Differ

Mar. 06, 2024
Self-Cleaning Oven Smell: Causes & Odor Reduction Tips

Mar. 06, 2024
Frigidaire Ice Maker Not Working? 7 Ways to Fix It

Feb. 05, 2024
Why Is Your LG Refrigerator Not Cooling? (9 Common Reasons)

Feb. 05, 2024
GE Oven F2 Error: Causes & Solutions

Jan. 03, 2024
How to Reset the Water Filter Light on a Samsung Refrigerator

Jan. 03, 2024
Maytag Washer Showing F5 Error Code? Here’s What To Do

Jan. 03, 2024


